

When a student plans to study MBBS abroad, families usually begin with three questions: Which country is suitable? Which university is reliable? How much will the complete course cost?
Documentation often receives attention only after the university is selected. By then, a name difference in a certificate, an expired passport or a missing original can add extra processing time. It may also affect university submission or student visa preparation.
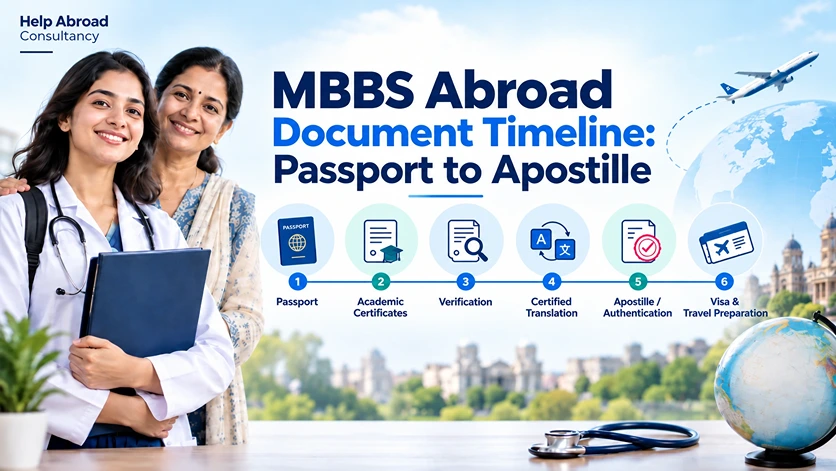
A clear MBBS abroad document timeline helps parents organise each stage in the correct order. This guide explains when to prepare the passport, academic records, verification, translation, apostille or authentication, medical documents and visa file.
Document requirements can change according to the destination country, university, embassy, student profile and current regulations. Use this guide for planning, then confirm the final checklist through the relevant official authority.
Why Students Delay Documentation
Many families assume that documentation starts only after receiving an admission or invitation letter. In practice, several important checks can begin much earlier.
Common reasons for delay include:
- Spending months comparing countries and universities before checking the passport and academic records
- Waiting for an admission letter before collecting original certificates
- Assuming every country follows the same attestation and translation process
- Not checking whether names, initials and dates of birth match across documents
- Leaving medical and financial documents until the visa stage without understanding their required format or validity
The aim is not to complete every document immediately. It is to identify what can be prepared early, what has a limited validity period and what depends on an earlier step.
Why MBBS Abroad Documentation Needs a Proper Sequence
Documentation is not a collection of unrelated tasks. Some stages depend on the completion of the previous stage.
Passport → Academic Documents → Verification → Translation → Apostille/Authentication → University Submission → Visa Process
For example, a spelling difference between the passport and Plus Two certificate may require clarification or correction before verification. If verification is delayed, the document may not be ready for apostille, authentication or university submission at the expected time.
Not every task must be completed one after another. Students can often collect certificates, create digital backups and research university requirements while the passport process is underway. A proper sequence simply helps the family understand which tasks can run together and which ones cannot move forward without an earlier document.
Documents Parents Should Verify Before Starting Applications
Before paying an application or document-processing fee, parents should complete a basic document audit.
- Name spelling: Compare the student’s full name and initials across the passport, Class 10 and 12 records, birth certificate and identity documents. A difference may require clarification, an affidavit or a correction.
- Date of birth: Confirm that it matches across the passport and academic records.
- Parent names: Check spelling and order, especially when a parent will provide visa sponsorship or financial documents.
- Original certificates: Locate the marksheets, passing certificates, Transfer Certificate and Migration Certificate, or confirm how to obtain them.
- Passport validity: Check the expiry date and physical condition. Passport requirements for MBBS abroad, including remaining validity and blank pages, vary by destination.
- Digital backups: Create clear, uncropped colour scans of both sides where relevant and use clear filenames.
Month-by-Month MBBS Abroad Document Timeline
The following schedule is a planning framework, not a fixed government processing timeline. Actual requirements and processing periods may vary.
| Planning Stage | Recommended Action | Main Purpose |
|---|---|---|
| 10–12 months before intake | Apply for or renew the passport; compare identity and academic records | Identify corrections early |
| 6–8 months before intake | Collect original academic certificates, TC and Migration Certificate; retain the NEET scorecard | Build the core admission file |
| 4–6 months before intake | Confirm country and university requirements; begin applicable verification or authentication steps | Prepare documents in the required format |
| 2–4 months before intake | Complete the required apostille, legalization and certified translation process | Prepare documents for international use |
| 1–2 months before travel | Arrange time-sensitive medical, financial and visa documents | Complete student visa preparation |
Phase 1: Passport and identity review
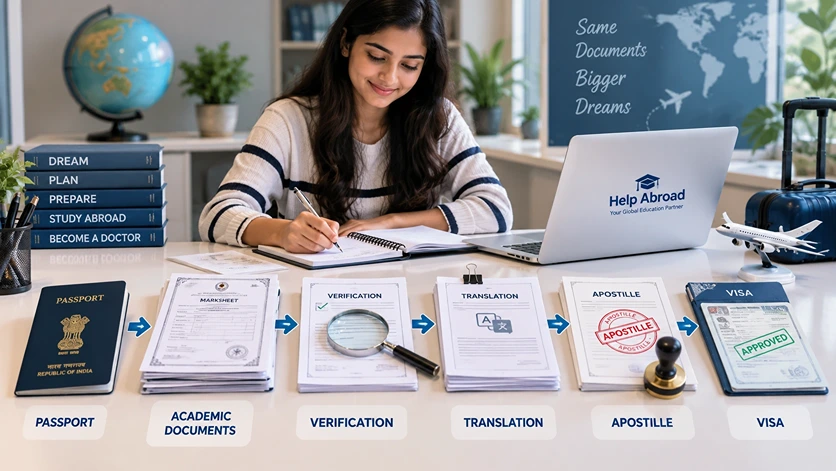
Apply for or renew the passport early. Confirm destination-specific validity and blank-page rules, then compare the student’s name, date of birth and parent details across all major records. If details differ, check whether a correction, affidavit or supporting record is needed.
Phase 2: Academic document collection
Collect the records requested by the university. These may include Class 10 and 12 records, Transfer Certificate, Migration Certificate, NEET-UG scorecard, birth certificate, passport copy and photographs. The exact list differs by destination and university. Never hand over originals without an acknowledgement and secure handling process.
Phase 3: Verification, apostille or authentication
The route depends on the document and destination. Educational and personal records may follow different processes. An apostille is generally used where the Hague Apostille Convention applies; other cases may require authentication or embassy/consular legalization. Digital verification options such as e-Sanad also depend on the issuing authority.
Before starting the apostille process for MBBS abroad, confirm:
- Which original documents require processing
- Whether prior verification by the issuing authority or a state authority is needed
- Whether apostille, authentication or embassy legalization applies
- Whether the university accepts the original, a legalized copy or a digital document
- Where translation belongs in the required sequence
Phase 4: Certified document translation
Some authorities ask for records in the destination country’s language. They may request a certified or notarized translation, a translator declaration or translation after arrival.
For document translation for foreign universities, verify:
- The language required
- Who is permitted to translate the document
- Whether seals, stamps and apostille pages must also be translated
- Whether translation is required before or after authentication
- Whether the university or embassy has a prescribed format
Do not rely on a general translation if the receiving authority requires a specific certification.
Phase 5: Medical, financial and student visa documents
Medical reports, Police Clearance Certificates and financial records may have issue-date or validity limits. Prepare them closer to visa submission, based on the current embassy checklist. Student visa document preparation may include the admission or invitation letter, passport, application form, medical reports, PCC, sponsor and bank records, insurance, accommodation or travel details.
Why Country-Wise Requirements Are Different
A document list used by one student should not automatically be copied by another. Requirements can depend on:
- The destination country
- The selected university
- The authority receiving the document
- The student’s nationality and visa category
- Current embassy, immigration and education regulations
Even two universities in the same country may request documents in different formats or at different stages.
Georgia
Students may be asked for apostilled academic or civil documents and translations that meet university or local requirements. The exact list and translation stage should be confirmed with the selected university and current visa guidance.
Russia
Universities may request legalized or apostilled educational records, certified Russian translations and medical documents. Translation and notarization arrangements can vary by university and may be completed in India or after arrival, depending on the instructions received.
Uzbekistan and Kazakhstan
Students may need verified academic records, appropriate authentication, Russian or local-language translations, and specified medical forms. Requirements can vary between universities and admission cycles.
Philippines
The academic pathway, university admission documents and eligibility considerations can differ from those in other destinations. Students should confirm the current course structure and regulatory eligibility before paying fees or beginning document legalization.
These examples are only a planning overview. Always work from the current written checklist issued by the university and relevant official authorities.
NMC and NEET Checks Before Choosing a Foreign Medical Course
Documentation should support both admission abroad and the student’s future eligibility in India.
Under the NMC Foreign Medical Graduate Licentiate Regulations, 2021, the foreign medical qualification must meet specified conditions. These include requirements connected with course duration, internship, subjects, English as the medium of instruction, clinical training and eligibility for registration or a licence in the country where the qualification is awarded. The regulations refer to a minimum medical course duration of 54 months and a minimum 12-month internship, subject to the full conditions in the regulations.
For Indian citizens and Overseas Citizens of India who intend to obtain a primary medical qualification abroad and later seek eligibility in India, a qualifying NEET result is treated as the eligibility certificate under the applicable rules. The result has been provided a three-year validity period for this purpose.
Regulations, advisories and licensing examination arrangements can change. Before confirming admission, students should review the latest NMC notices and verify that the complete course—not only the university name—meets the rules applicable to their admission year.
Students should also preserve passports, visas, travel records, admission letters, fee receipts and academic records throughout the course. These may help establish the duration, location and nature of study if supporting evidence is requested later.
Common MBBS Abroad Documentation Mistakes
1. Ignoring differences in names or initials
Initials are often abbreviated on school records and expanded on passports. Do not assume the difference will be accepted automatically. Check whether a correction, affidavit or other supporting evidence is required.
2. Starting authentication before confirming the destination requirement
Apostille and legalization are not interchangeable in every case. Processing the wrong document through the wrong route can waste time and money.
3. Using a translator without checking acceptance
A technically correct translation may still be unsuitable if the university or authority requires a particular certification, seal or translator qualification.
4. Preparing time-sensitive documents too early
Medical reports, PCCs and financial records may need to fall within a specified period at the time of submission. Confirm the acceptable issue date before obtaining them.
5. Sending originals without a tracking process
Maintain an inventory of every original handed over, obtain an acknowledgement and keep clear scans before dispatch.
6. Following another student’s checklist without verification
A previous applicant’s experience can be useful, but it should not replace the current university and embassy checklist.
The Three-Tier Document Organisation System for Parents
A simple system helps parents protect originals while keeping working copies easily available.
Tier 1: Original document file
Store the passport, original academic records, birth certificate and other irreplaceable documents in a water-resistant folder. Do not carry every original unless it is required.
Tier 2: Working submission file
Keep verified copies, apostilled or authenticated sets, certified translations, admission letters, fee receipts and visa documents in submission order.
Tier 3: Secure digital backup
Save high-resolution colour PDFs in organised folders. Use clear filenames such as StudentName_Class12_Marksheet.pdf. Keep access protected and share files only with authorised people involved in the application.
Final Verification Checklist
Before university submission or a visa appointment, check the following:
- Student’s name, date of birth and parent details have been compared across records
- Passport meets the current destination and visa requirements
- Required original academic certificates are available
- The university’s latest written document checklist has been reviewed
- The correct apostille, authentication or legalization route has been confirmed
- Translations follow the receiving authority’s language and certification rules
- Medical reports and PCC are within the required validity period
- Financial and sponsorship documents follow the current visa format
- Every document submitted has a clear digital backup
- Originals handed to another party are recorded and acknowledged
Final Verification Checklist
Before university submission or a visa appointment, check the following:
- Student’s name, date of birth and parent details have been compared across records
- Passport meets the current destination and visa requirements
- Required original academic certificates are available
- The university’s latest written document checklist has been reviewed
- The correct apostille, authentication or legalization route has been confirmed
- Translations follow the receiving authority’s language and certification rules
- Medical reports and PCC are within the required validity period
- Financial and sponsorship documents follow the current visa format
- Every document submitted has a clear digital backup
- Originals handed to another party are recorded and acknowledged
Why Students Choose Help Abroad for Documentation Guidance
Parents do not always need more paperwork. They need clarity on what is required, when it should be prepared and how each document connects to the admission and visa process.
Help Abroad Consultancy supports students and parents through:
- Early document checking: Reviewing available identity and academic records before the application reaches a time-sensitive stage
- Identifying possible mistakes: Flagging name, date-of-birth or document-availability issues that may require attention
- Country-specific guidance: Helping families understand the checklist provided for the selected country and university
- Admission document preparation: Organising documents for university submission in the requested format
- Visa documentation guidance: Helping students prepare the required file based on the current visa checklist
Requirements and final decisions remain with the university and relevant authorities. Our role is to help families prepare a clear, complete and well-organised application.
Frequently Asked Questions
Begin the initial document review around 10 to 12 months before the intended intake where possible. Passport renewal, certificate retrieval and correction of inconsistent details may require additional time. Time-sensitive medical and financial documents can be prepared later according to the visa checklist.
Some universities may allow an initial enquiry or provisional review without a passport, but a valid passport is generally needed to complete admission and visa formalities. Confirm the selected university’s application requirement and begin the passport process early.
The receiving authority may ask for clarification, an affidavit, supporting records or a formal correction. The solution depends on the type of difference and the authority reviewing the document. Obtain guidance before beginning verification or legalization.
No. The correct process depends on the destination and the legal arrangement applicable to the document. Some cases may require an apostille, while others may require authentication or embassy/consular legalization.
Students should locate their passport, Class 10 and Class 12 records, birth certificate, NEET scorecard, TC and Migration Certificate where available. The final submission list must come from the selected university.
Complete translation only after confirming the required language, translator qualification, certification format and whether translation must happen before or after apostille or authentication.
Prepare them according to the current university or embassy validity requirement, usually closer to visa submission or travel. Avoid completing time-sensitive tests too early.
Choosing the right country and university is only one part of MBBS abroad admission. The documentation process also needs a clear timeline, correct sequence and careful verification.
Start by checking the passport and academic records. Complete translation, apostille or authentication only after confirming the selected university’s requirements. Prepare time-sensitive medical and financial documents closer to the visa application.
There is no single document checklist that applies to every student or country. Always follow the latest university, embassy and NMC guidelines relevant to the admission year. A properly organised document file makes each stage easier for both students and parents.
I couldn’t update the saved file directly because the workspace is currently unavailable.
Need Help With Your MBBS Abroad Documents?
Get expert guidance for passport, verification, apostille, translation, admission, and visa documentation.
Talk to Help Abroad Consultancy
1 Comment